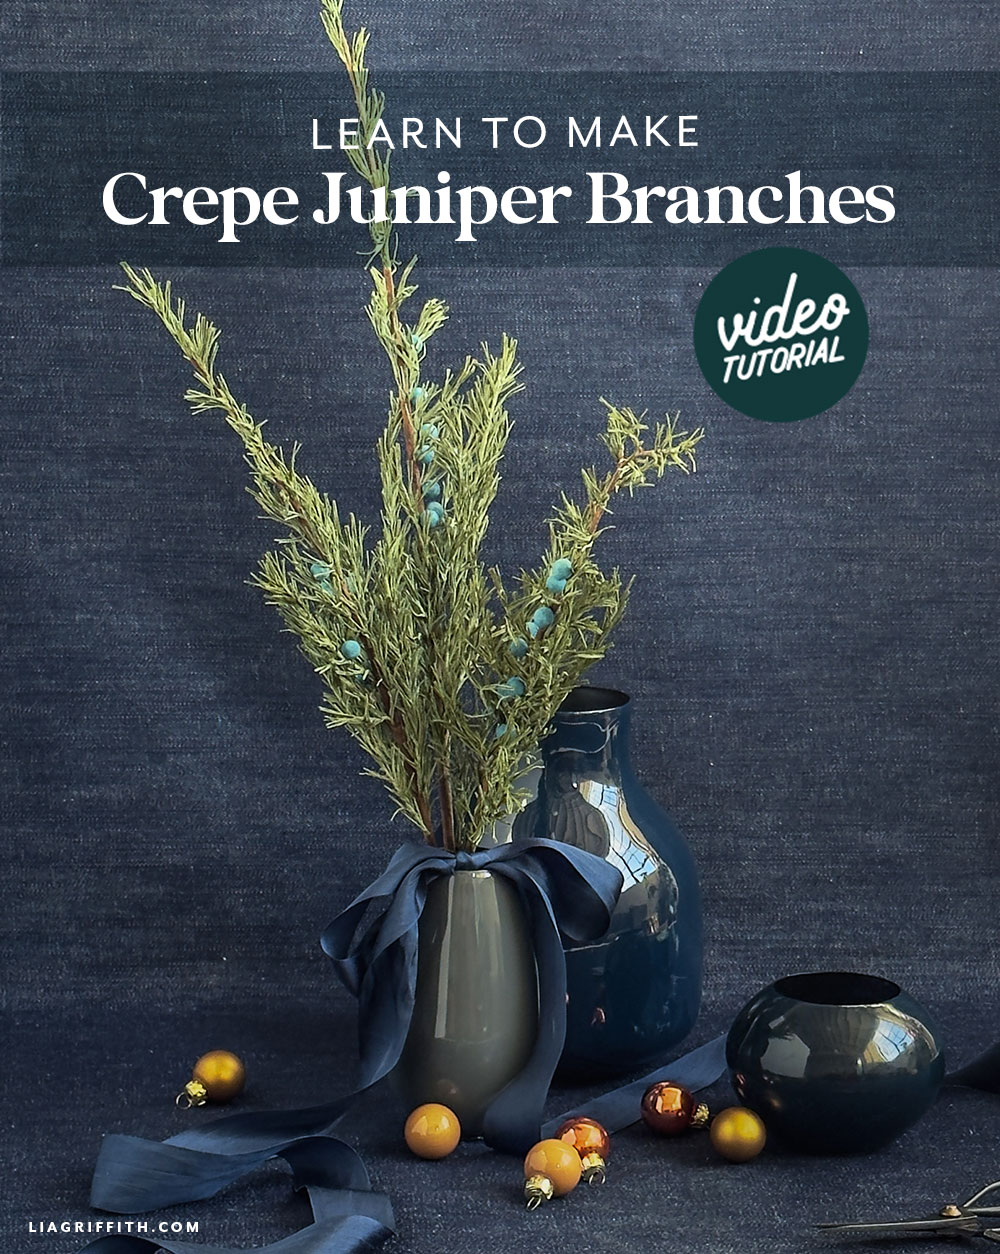
Crepe Paper Juniper Branches Video Tutorial

Holly Jolly Juniper
Bringing the iconic evergreen energy of the season into your home for the holidays is nothing short of magical. Our Crepe Paper Juniper Branches effortlessly capture that feeling in lush, lifelike detail. These wonderfully realistic branches add more than a touch of winter elegance to your space and can be used just about anywhere. Whether you’re crafting a seasonal centerpiece, sprucing up a wreath, or building a full arrangement for your mantle — these juniper sprigs bring a natural charm that feels timeless. Video Tutorial will be released on December 5th.
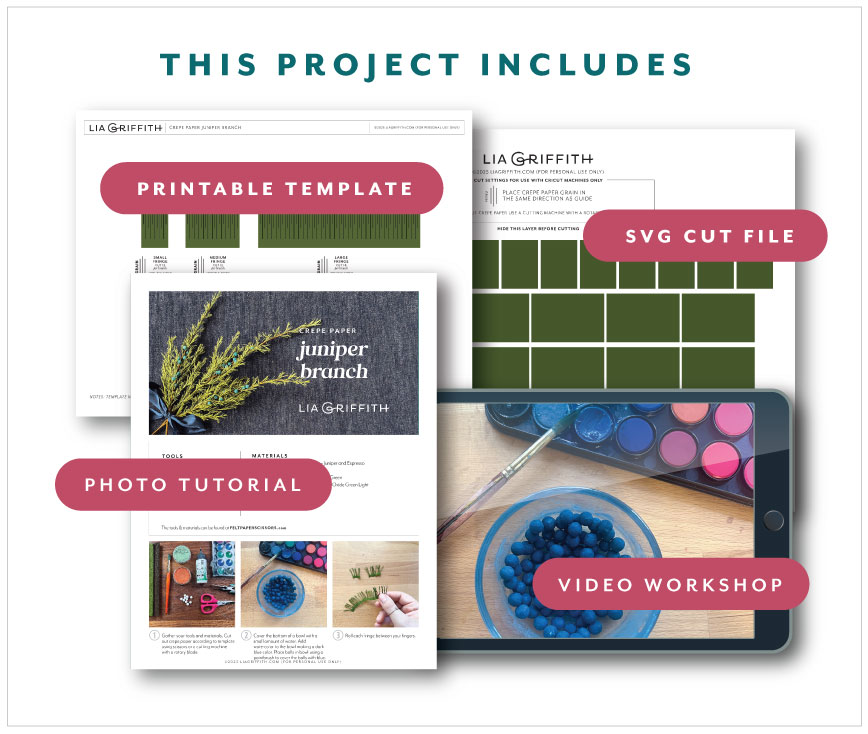
Tools
Materials
- Lia Griffith Extra-Fine Crepe Paper – Juniper and Espresso
- 8mm Spun Balls
- Floral Wire – 24-Gauge Paper Covered Green
- PanPastel - Burnt Sienna and Chromium Oxide Green Light
- Watercolors Set
- Bearly Art Precision Craft Glue - 2oz
Goodies You Can't Google
You've found a premium project. But for less than the price of a fancy coffee... You'll get instant access to this and over 2,000 other premium projects inside the Lia Griffith membership!
Become a Member
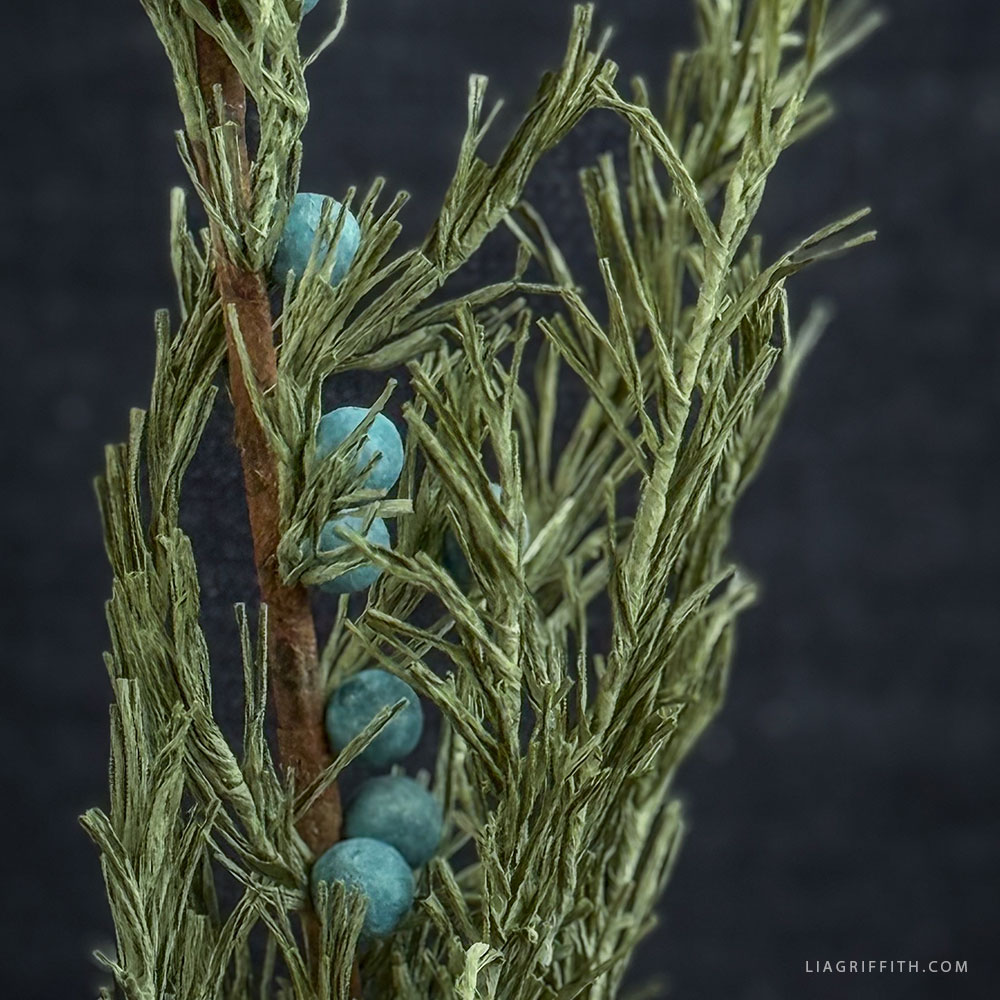
Though we consider this an intermediate to advanced project, our video tutorial makes these Crepe Paper Juniper Branches a fun challenge for all skill levels. Together, we’ll shape, curl, and assemble your branches into beautiful seasonal decor. To start, you’ll trim your crepe paper pieces, form individual needle clusters, and layer them along floral wire until your branch takes on that familiar, feathery fullness unique to juniper. While the steps are detailed — don’t worry — we’ll be with you every part of the journey!
Juniper has a long and meaningful history across cultures. For instance, it has symbolized longevity, purification, and protection for centuries. Ancient traditions also often placed juniper near doorways or burned its berries as incense to welcome good fortune and ward off negativity. Further, its hardy green needles represent resilience and hope — qualities we can all hold a little closer during the holiday season.
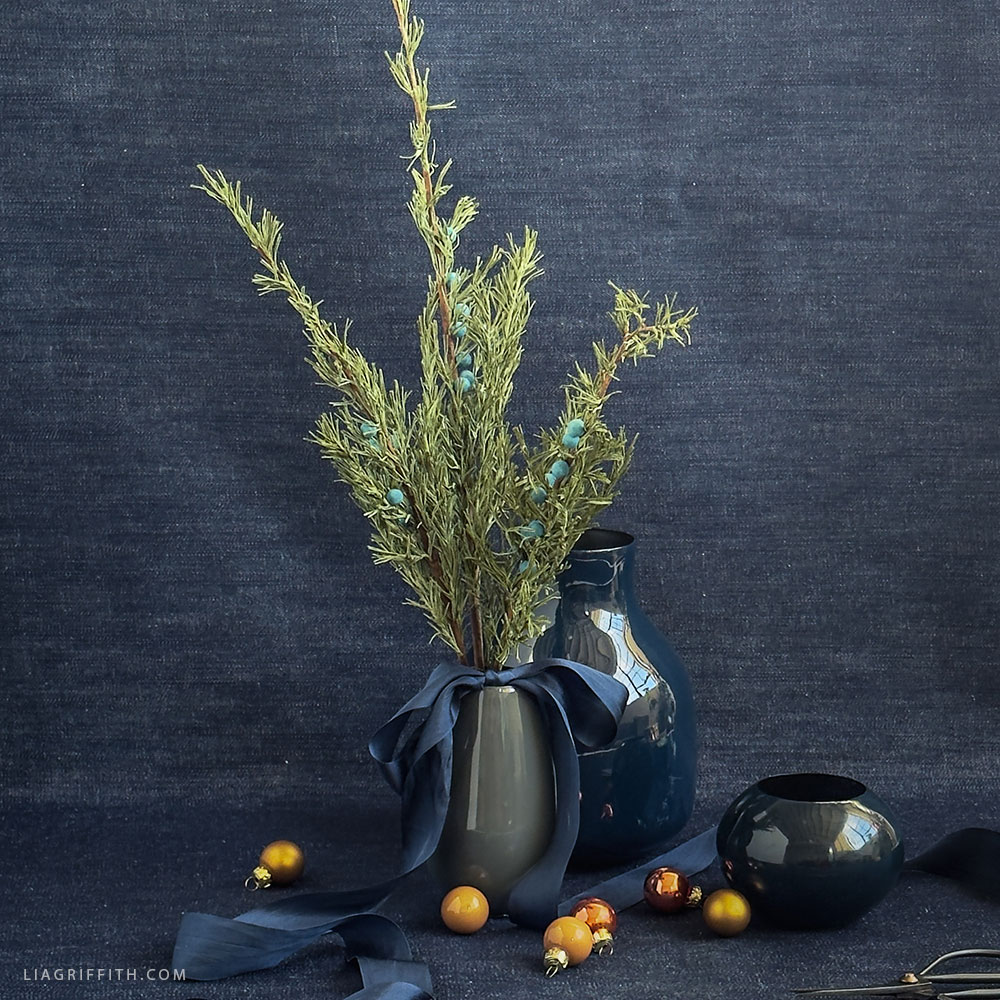
When you're all finished, there are endless ways to display your Crepe Paper Juniper Branches. Arrange them in a simple vase for a clean, natural look. Alternatively, you could also tuck them into garlands or wreaths for added depth. They also make beautiful embellishments for gift wrap, place settings, or handmade centerpieces.
However you show them off, don’t forget to give us a peek! Share your Crepe Paper Juniper Branches with us using the hashtag #MadeWithLia on your social media platforms, and don’t forget to post in our crafters’ community to get inspired — and be an inspiration to others.
A Beginner's Guide to Crepe Paper Flowers
Ready to take our member-favorite master class to learn all the tips and tricks for making beautiful crepe paper flowers? This course is free for annual members.

All the Goodies You Can't Google 🎁
Tired of scrolling endlessly for the perfect project? Save time, money, and Google-induced headaches with us! Our membership makes it easy to create beautifully finished crafts without needing to look all over the internet for ideas and materials or spend lots of money on individual videos and templates.
Become a Member
Discussion
Ask Lia or the community!
8 Comments
-

Rebecca
December 6, 2025 at 7:09am
-

Lia
December 6, 2025 at 5:21pm
@Rebecca
-

Charlene
December 5, 2025 at 1:54pm
-

Lia
December 6, 2025 at 5:25pm
@Charlene
-

Susan
December 1, 2025 at 11:29am
-

Lia
December 2, 2025 at 8:39am
@Susan
-

Susan
December 2, 2025 at 11:18am
@Lia
-

Lia
December 3, 2025 at 9:34am
@Susan
Back to the TopThanks for the video Megan. I really enjoy how you demonstrate.
Love hearing that! 🙂
What a great way to color the balls. I really appreciate all the new techniques you show us.
Merry Christmas
Always looking to improve! 🙂
Yeah – another winter branch to add to our collection. Since I am cutting the fringe pieces by hand, I would like to cut them before Friday’s video release. I have two questions: (1) Do I use DS fern & moss for the fringe? The materials list calls for extra-fine juniper and does not list DS fern & moss; however, the pdf template calls for DS fern & moss for the fringe pieces. (2) Are the fringe slits cut at varying lengths? While the pdf shows varying lengths for the fringe slits, the photo tutorial seems to show the slits all the same length (step 3). Thanks so much. Have a great day!
Hi Susan, thank you for catching my mistake! You will be using extra fine juniper, we will update the template. The template is correct in showing the the fringe is cut at varying lengths. If cutting by hand I would suggest cutting the deeper fringes first with the paper in a fringe clip and then go back and simply cut each fringe in half but with a shallower cut.
Thank you. By the way, I cast my vote for an annual Crafty Wonderland!
Yay! That vote seems to be THE one!